
Turtle Punch Art
Easy Turtle Punch Art Craft Project
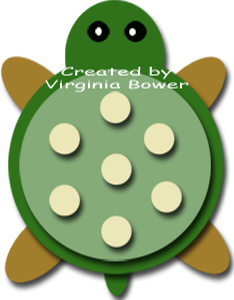

This turtle punch art is made from simple circles and ovals. These are so easy they would be good for children to make with adult supervision!
Be sure to scroll to the bottom of this page to see the second turtle project.
this turtle punch art, go and make the others!
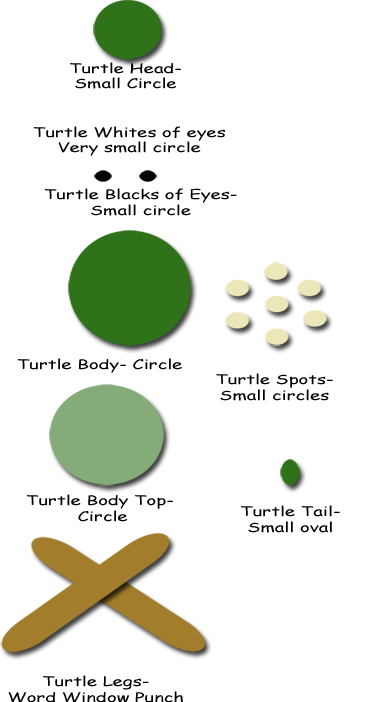
Step 1:
Layer the larger green circle under the smaller circle and adhere.
Step 2:
Layer the spots on top of the lighter colored circle.
Step 3:
Adhere the head at the top.
Step 4:
Criss cross the window punches and adhere them under the larger circle adjusting them so they stick out equally. These are the feet.
Step 5:
Adhere the tail on the back underneath the larger circle letting just a little hang out.
Step 6:
Adhere the black circles to the head and either use a marker to color in a little bit of white on the black or cut smaller circles and adhere them on.
Number Two:
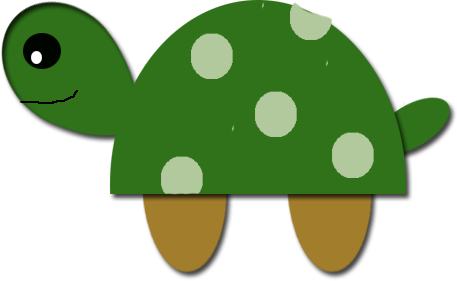
This one is just as easy as the first one, the only difference really is that the body is a circle cut in half giving the turtle a sideways look.
Use the word window, but only one of them and cut it in half to make the legs. The spots look pretty good if you cut a couple of them in half and put them on the edges of the body.
So, there you have two really cute turtle punch art projects!
Again, These are really easy to make, and you can do so much with them.
Attach them to large paper clips and use them as bookmarkers.
The would make great gifts.
Or if you are having a party for a child
attach them to gift bags or to cup or put on a tooth pick and stick in cup
cakes!
Craft Projects
Seasonal
- Christmas Crafts
- Halloween Crafts
- 4th of July Crafts
- Mother's Day Crafts
- Father's Day Crafts
- Valentine's Day Crafts
- St. Patrick's Day Crafts
Resources


New! Comments
Have your say about what you just read! Leave me a comment in the box below.