
Gift Bows : You Can Make Yourself
Top Your Gifts With Beautiful Inexpensive Gift Bows!
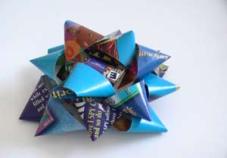

Place beautiful gift bows on your package and you have something special to give! If you know a couple of little tricks, you will be able to top all of your gifts with inexpensive but beautiful toppers! This project will be so helpful throughout the entire year. These are fantastic for Christmas and birthdays, just change up the color or type of paper!
Discover new and easy ways to wrap your gift baskets with cellophane or fabric.
If you need to watch the gift bows video before you begin click here.
Remember to subscribe to all of our craft videos, it's free and you will be notified when we have a new one!
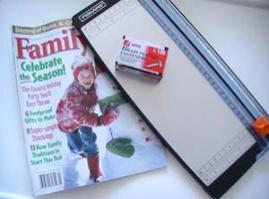
Supplies Needed to make Gift Bows:
- Old Magazine, sales pages (or any paper you have)
- Cutter or scissors
- Brass platted fastener
- A piece of double sided tape
Step One:
Tear out three sheets from an old magazine, or you can use left-over scrapebook paper or even sales pages to make your bow. I like the shiny pages from sales pages and magazines the best, but you can use just about any type of paper for this craft project.
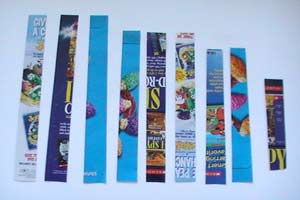
With the pages together cut 1 inch stripes from the length of the paper, you'll only have to cut three stripes if you cut the pages together. You should have a total of 9 stripes when done cutting.
Leave your first three stripes the same length after cutting the strips.
The next three strips should be an inch shorter than the first three strips.
Take the next three strips and cut 2 of them 2 inches shorter than the original strips.
The last strip should be cut down to be 3-4 inches shorter than the original strips.
Step Two:
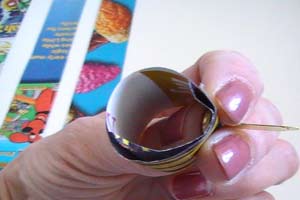
Take the shortest strip and make it into a hollow tube like shape. Use the fastener and poke it through the hollow tube from the inside. Make sure you have the ends of the paper over-lapping so it holds together.
Step Three:
Take your next shortest strip and twist it around to look like a canoe. This is the part that could confuse you, so if you need to watch the video do so.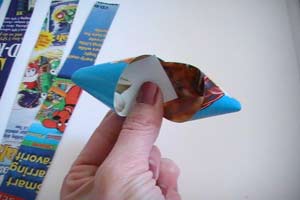
Once you have it twisted, poke it throud on the fastener. You will continue to do this with each strip. You will work from smallest to largest until they are all on the fastener.
Once you have all of your twisted strips on the fastener, bend the fastener open and flat just like you would if you were using it to hold papers together. When you are finished you will have this:
Step Five:
Add a piece of double-sided to the bottom and when you need a bow for your gift, just pull off the paper from the tape and put it on the gift. - YAHOO can't get easier than that! Your gift bows are finished!
Check out these I made the same way:
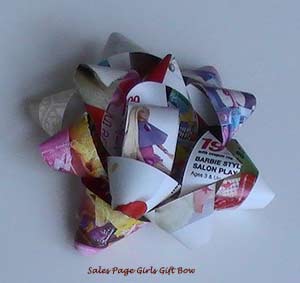
This one was made from a sales page that was featuring girl products like dolls and toys. It makes for a colorful topping for a present.
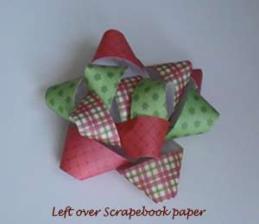
This one was created out of left over scrapbooking paper. It's amazing how many different looks you can come up with!
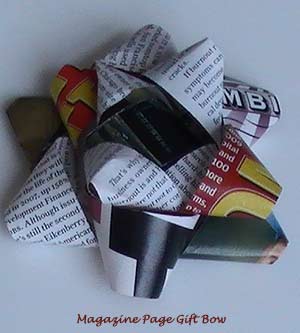
This one was made from a magazine and the colors were basically gray and black with a little red and yellow that came from an image on the page.
Craft Projects
Seasonal
- Christmas Crafts
- Halloween Crafts
- 4th of July Crafts
- Mother's Day Crafts
- Father's Day Crafts
- Valentine's Day Crafts
- St. Patrick's Day Crafts
Resources


New! Comments
Have your say about what you just read! Leave me a comment in the box below.