
Lion Punch Art
Easy Lion Punch Art Craft Project
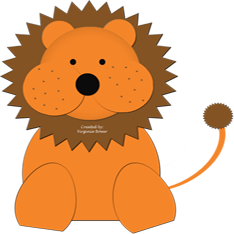

Here are the free Lion Punch Art instructions. This is a very easy paper punch project that you can do in as little as a few minutes!
And, These are really easy to make, and you can do so much with them.
Attach them to large paper clips and use them as bookmarkers.
The would make great gifts.
Or if you are having a party for a child attach them to gift bags or to cup or put on a tooth pick and stick in cupcakes! Try and come up with other ideas.
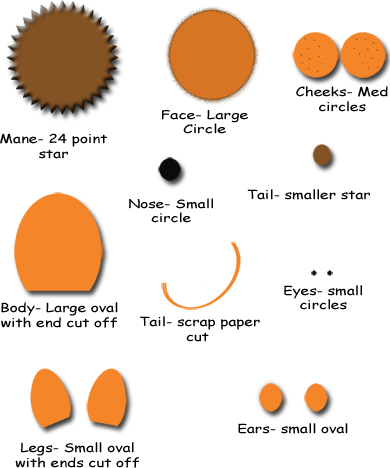
Lion Punch Art Supplies Needed:
24 point star Large
24 point star small
9 circles for the face
3 ovals 1 large and 2 small for the body and legs.
The tail is just a scrap
Once you have made this great lion punch art project- Go back and make the others!
Step 1:
Take the star and layer the face of the with the circle and adhere.
Step 2:
Adhere the ear circles to the back of the face circle leaving a good amount sticking out.
Step 3:
Adhere the nose to the center of the face.
Step 4:
Now take the two cheeks or larger circles and put some dots on them. Adhere them to the face at the side of the nose.
Step 5:
Put the eyes right above the cheek circles and adhere.
Step 6:
Adhere the body (large oval with the bottom cut off) to the back of the star or the mane of the lion. The edge that you cut off is the bottom.
Step 7:
Take the smaller two ovals and cut the bottoms off of them and angle them and adhere them to the body oval.
Step 8:
Take the scrap of thin long paper you cut and curl it slightly by wrapping it around a pencil. Adhere one end to the bottom of the body oval. Now, take the smaller star and adhere it to the other end of the scrap paper.
YAHOO! Your Lion Punch Art is done.
Craft Projects
Seasonal
- Christmas Crafts
- Halloween Crafts
- 4th of July Crafts
- Mother's Day Crafts
- Father's Day Crafts
- Valentine's Day Crafts
- St. Patrick's Day Crafts
Resources


New! Comments
Have your say about what you just read! Leave me a comment in the box below.