
Halloween Goodie Bag
Try this great little Halloween Goodie Bag!
Watch Halloween Goodie Bag YouTube Video Here!
Here is a very cute Halloween goodie bag that can be made in just a few minutes. Use them as Halloween party favors, then your guests can take something home with them and they won't forget your Halloween party! You can also make this into a great easy kids craft project if you are entertaining children. Make sure you put some of these out for the trick or treaters!
You can make these with regular printer paper if you want too, and you can also download my pattern paper to print. Here is my Halloween Goodie Bag paper.
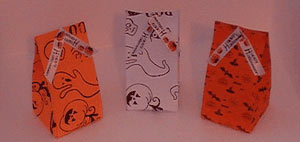
This is the goodie bag we will be making! It is the one to the far right above. The others are shown so you can see different ways this craft project will look with other designs or clear or rubber stamps. If you don't already have clear or ruber stamps, a great place to start looking is on amazon or ebay.
Supplies to make a Halloween Goodie Bag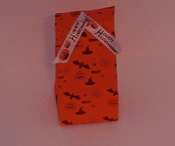
Cardstock or printer paper
- Scissors
- Scoring tool
- Adhesive (I used Scor Tape)
- Ribbon 4 inches
- Halloween Candy
Step-by-step Instructions for Halloween Goodie Bag
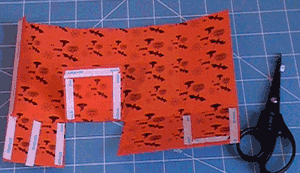
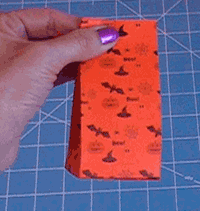
1. Cut your paper to 8 1/2 by 6 inches.
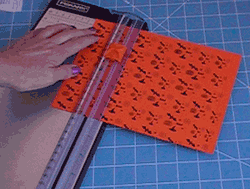
2. Score on the long side, the 8 1/2 in side at 2 inch, 4inch, 6 inch and at 8 inches. Then turn your paper to the 6 inch side and score at 2 inches.
3. Turn your paper so you can see the four squares at the bottom. Using your scissors or cutter cut from the bottom of the paper on the score line up to the 2 inch score line. When you get to t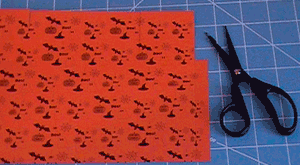 he very last cut you can just cut that section off because you will not need it. Shown below.
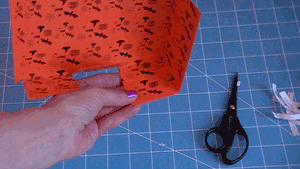
4. Fold on all the score line using a bone folder to ensure a nice crisp fo ld.
ld.
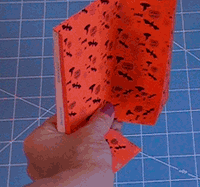
5. Put adhesive or scor tape on the flaps shown. Don't forget the smaller flap all the way to the left!
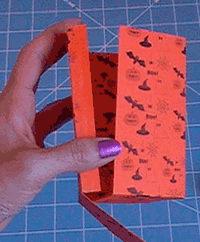
6. Remove the backing from the adhesive if you are using red sticky tape or scor tape. Take the square to the far left and line it up with the score lines from the square right nest to it, it would be the one without adhesive on it.
Continue lining up the squares as shown. The third square fits right on top of the previous square.
Put the flap inside and adhere before lining the last square up on the bottom, it just seemed easier that way!
7. One all the sides and flap have been adhered, make sure the seam from the flap is in the back of the bag. With the bag facing you, squeeze the top front and back together to give it a little crease.
8. With your 4 inch piece of ribbon fold the ribbon over so you have a V shape.
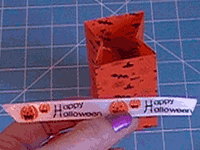
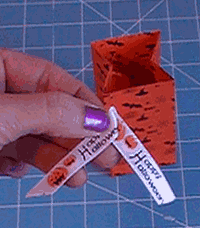
9. Put Candy in your Halloween Goodie Bag! Now Squeeze the bag together again and staple your ribbon on the bag, this will also keep your bag closed. 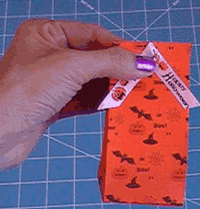
And... YAHOO! You have yourself a super cute Halloween Goodie Bag!
Watch YouTube Video!
Craft Projects
Seasonal
- Christmas Crafts
- Halloween Crafts
- 4th of July Crafts
- Mother's Day Crafts
- Father's Day Crafts
- Valentine's Day Crafts
- St. Patrick's Day Crafts
Resources


New! Comments
Have your say about what you just read! Leave me a comment in the box below.